
Prepping Your Guests
The most stressful part of an interview–for the producers, talent, and guest–is just getting everything set up well when we start. That’s fixable.

Welcome to Dispatch #84 of The Audio Insurgent.
When I do consulting for organizations about podcast strategy and podcast making, I often say that I’ve been part of the creation of more than 200 podcasts, radio programs, and streaming projects. During those projects, I’ve made every possible mistake you can imagine, some…many times. After a while, you start thinking, “Gee, maybe there’s a smarter way to do this.” Thus, the birth of much of my consulting advice.
Today’s dispatch features a list you can rip and reuse that addresses something I did improperly for years (and likely you have been screwing this up too): prepping guests for the tech and logistics needs of a contemporary podcast recording.
And yes, including a lot of advice for getting better looking video.
It’s been a while since we did a “tools you can use” dispatch, so without further ado…
[PREPPING YOUR GUESTS] With the growth of video in podcasting, and with podcast guests and producers continuing to prefer remote recording, our industry needs to do a better job of working with the guests in advance of interviews to get the best quality audio and video to match the importance of their contributions.
Most current practices are kind of lazy, archaic, still too audio-based, and your guests may not say so…but it is super stressful for them.
So I created something I’d like to share with you to help.
Let me explain how we got here and why it matters.
If you are curious about what that picture is…it’s Deepak Chopra’s ear.
Most people who are relatively new to podcasting don’t realize that a lot of the tools they use every day are surprisingly new. While it was kinda possible to do remote recording before the pandemic, it was during that time, as people scrambled around, that services like Riverside and SquadCast really took off (Zencastr did exist before the pandemic, but it was often kind of a pain to get it to work).
Those early days of the pandemic were a free-for-all, with producers trying all kinds of ridiculous ideas to capture semi-decent audio from hosts and guests, including FedEx-ing equipment, kludging a bunch of adapters and cables to get audio into a computer, and, like Deepak and I did, hacking FaceTime on an iPhone to record tracking for the early pandemic show we made called Now For Tomorrow (surprisingly, the audio sounded remarkably good, although I also captured 20 minutes of video pretty much exclusively of Deepak’s ear).
Back then, no one cared about capturing video. And it was crazy times – so we were all just happy to capture anything on tape, almost regardless of how it sounded or what it took to capture it. Just get it.
In the years since, remote recording has taken deep root, yet we still do little more than send a URL to guests. Sure, the default invite suggests the guest use Chrome, but what if they don’t already use Chrome? Or don’t know how to install it? We basically leave them on their own.
But that’s just the beginning of the stress. Once the guest joins, they are excited and nervous, and we bark instructions at them about the boominess of the room and where they are pointing their mouth. And now with video, we bark a whole lot more about getting them to sit in better light. It just starts things off with the worst kind of energy.
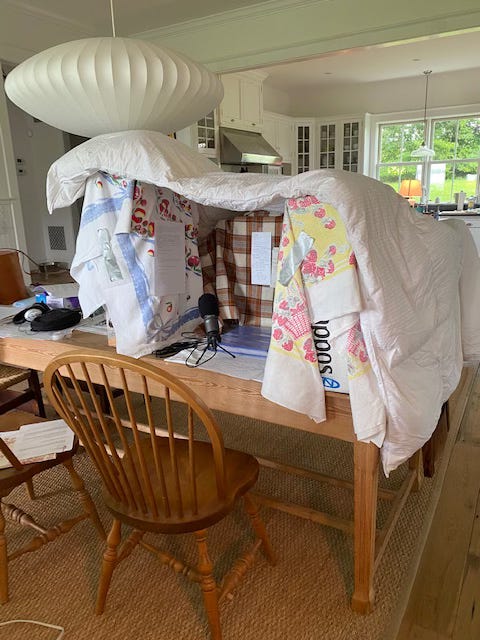
Over the years, I’ve written a few sets of instructions for guests and talent to help them do everything from building pillow forts (like this pic, sent by a host to get my approval), set up USB microphones (a relatively new concept at the time), how to operate a Zoom recorder (the audio hardware, not the conferencing platform), and how to upload the contents of an SD card to Dropbox.
But with the hardware and tech in a constant state of evolution–the instructions got stale very quickly. And frankly, most of us just stopped doing it. Give them the URL and just capture it, then fix it in post.
Over the past few months, I’ve been writing and editing a set of contemporary instructions that dispenses with the pillow fort instructions and focuses on what’s most important for setting everyone up for success. If video has taught me anything as a podcaster, it’s that capturing the best quality in the moment is really critical to ending up something you’ll be happy with later. You can’t EQ-away crappy lighting.
And since I believe that one of the reasons The Audio Insurgent exists is to share, I’m going to give those instructions for you to use in your work.
Before I do so, many of those who advise me don’t like when I do things like this, arguing that it is akin to doing someone’s homework for them. So what I’d ask is that if you use this as a resource for your team, make sure you acknowledge to them that it came from The Audio Insurgent.
So here it is. I tweak this every time I open it, including when I opened it to share here. If you are reading this at some point in the future, know that there is probably an updated version of this. If you are a paid subscriber to The Audio Insurgent, I’ll send you the latest version just for asking.
Important notes:
It includes a number of things you’d likely never think of (like making sure the guest’s computer is plugged in) that cause issues all the time. Don’t be tempted to exclude these. Remember, sure, you are an audio pro, but the guest isn’t.
You’ll see mentions of a pre-interview tech check. This is increasingly becoming a default practice for us. It is always a good use of time and worth the effort for everyone.
Enjoy.
Remote guest recording information and instructions
Hello! We are looking forward to having you as a guest on our show.
This will be both an audio and video recording and what follows will help you get ready. After reviewing, if you have any questions or concerns, please let us know and we’ll work with you to get everything set up for a stress-free interview.
Since this will be a remote interview, we wanted to run through some very simple tech requirements, best practices, and preferences for our show. We not only want to share your story and ideas, but we want to make sure you sound and look your best as well.
And most importantly, this should be enjoyable for you too. If anything goes wrong during the session, we’ll pause and fix it—no problem.
The following may initially seem like a lot–but it isn’t difficult, just comprehensive. And we’ll help you through every step.
Where to record and the equipment you’ll need
The technology we’ll use takes advantage of the camera you normally use on your computer, as well as a USB microphone, in order to get a really great quality recording–much better than you see on Zoom or video conferencing. And it all works through a web browser.
Location:
If you’ve done a number of remote media interviews before, you probably already have a location that you like to use. If this is new to you or you’d like some advice, here are some factors that can help make your side of the recording look its best.
Choose a quiet room with minimal echo.
If possible, turn off HVAC systems, fans, air purifiers, or appliances.
Silence phones, notifications, and smart speakers in the room.
If the room sounds “echoey,” soft furnishings (curtains, rugs, pillows, couches) help more than people realize.
Lighting tips:
Pick a location that’s well lit, but does not receive bright direct sunlight.
Make sure any light is in front of you (shining on your face) or to the side.
Do not pick a location with lighting behind you or directly above you.
If you own a ring light or light cube to improve the lighting at your location, make sure it is set to be brighter than any room light or natural light in the space. Make sure to position this light just above eye level pointing towards your face, slightly off center.
What is behind you matters:
Make sure you are ideally a minimum of 4-6 feet away from anything behind you (a wall, shelving, or bookcases). Otherwise it can look like you’re pressed right up against the background.
Review what appears on your computer camera to make sure that any items or information seen is something you are comfortable being seen by the public.
Avoid cluttered or reflective backgrounds.
Make sure to turn off any technology that blurs your background or puts a virtual background behind you. While these are fine in a business environment, they look terrible in a podcast recording.
Camera and monitor positioning:
Make sure the camera is at eye level. If it is too far above or below eye level, it will not be very flattering!
Distance from the camera: Frame yourself and adjust your camera distance/placement so your shoulders and the upper third of your torso are visible.
Make sure you position your camera and monitor so that when you’re speaking, you’re naturally looking toward the camera. Looking toward the camera helps create direct connection with the audience.
It’s fine to glance at the screen when listening.
What to wear:
In short, wear what makes you feel comfortable and presents your best self. With today’s technology, much of the old advice people hear about on-camera appearances (such as don’t wear stripes or patterns, etc.) no longer applies. However, you should remember that thousands of people will be seeing you, so you should present yourself well. Our host will be wearing stylish “business casual” clothing. There is no need to overdress or be formal.
That said, it is often a good idea to avoid white clothing, as many videos are subtitled and that can be difficult to overlay on top of white clothing.
Sit in a comfortable position and try to minimize movement.
Sudden gestures and shifting can cause blurring or autofocus hunting on some webcams.
And finally,
Make sure to plug your computer into power before the session.
Let others in your home or office know you’re recording.
If pets or kids are present, plan accordingly. If an interruption happens (and they do happen), we can easily edit it out, but it will be less stressful if others know you’re recording.
Required hardware:
Any recent model laptop or desktop computer (purchased within the last 3-5 years) has the tech specs and power to do well for this recording.
While most computer cameras will work well for our recording, we greatly prefer that you use an external USB microphone instead of your computer’s built-in microphone.
If you don’t own a USB microphone and would like two recommendations, we suggest:
A Rode NT-USB microphone (very reasonably priced and great quality)
Or a Shure MV7+ USB microphone (more expensive, but the best quality USB mic)
Alternatively, either wireless (like AirPods) or wired headphone mic is acceptable if a dedicated mic isn’t possible.
We also ask that you wear headphones for the recording (either wired or wireless). It will prevent delays in hearing and being heard, improve audio quality, and eliminate echo.
Required software:
For the recording (and test set up beforehand), you’ll simply click on the link we sent you.
Use a supported browser: Chrome (preferred), Firefox, or Microsoft Edge. Apple’s Safari is a great browser, but doesn’t work well with the recording platform we use.
If you don’t have Chrome installed on your computer, here is a link. It is very simple to download and install.
Do not use Incognito/Private browsing mode.
Close all other apps and browser tabs, especially those that might use your microphone or camera.
Temporarily disable VPNs, browser extensions, content blockers, and firewalls.
Allow browser Notifications from Riverside so recordings can process correctly.
You won’t receive notifications unless Riverside detects an issue.
Test Session
We’ll set up a time, usually a day or two before the scheduled recording, to do a quick tech and location check with one of our producers. During that time we’ll go over everything mentioned above: location, lighting, mic, headphones, and web browser connection. We’ll make sure everything is working properly, configured correctly, and looks and sounds great.
If it is more convenient, we can do this test recording with an assistant, colleague, or team member.
Please use the same computer, browser, and location for the test session and the recording.
During Recording
While the interview is going on, your computer is capturing the highest possible quality audio and video and uploading it in the background. You don’t need to worry or pay attention to this at all. However, sometimes what you see during the interview may look a little pixelated. Don’t worry, what’s being recorded in the background is significantly higher quality than what you hear or see during the live call.
Feel free to have water nearby; just avoid ice or noisy containers.
After Recording
This is probably the most important part of all. When the interview is finished, don’t leave right away. All the uploading that’s happening in the background needs a minute or two to catch up.
Keep the Riverside window open until your upload reaches 100% (or shows “Upload Complete”). We’ll let you know when it is okay to leave–though that often only takes a few minutes at most.
That’s it. Hope this is helpful to you. Again, it wasn’t until a guest I knew gave me a heads up that I even considered how challenging and frustrating this can be to someone who doesn’t do it very often.
Your job is to capture them at their best–to make sure their story, ideas, and contribution is top-grade. And a bit of handholding during the process can get them (and you) set up for the best.
Okay, that’s it for today.
Thousands of people read this newsletter without even a free subscription. If this was forwarded to you or you read this online, would you mind subscribing?
If you are a regular reader of The Audio Insurgent, I hope you’ll consider doing your part by supporting this work with a small donation. And if that’s too much, you are also always welcome to buy my book or (even better) buy me a beer.
Make great things. I’ll be listening.
--Eric